
Jack's Burp Configuration
About Burp Suite
Burp Suite is a widely-used web application security testing tool employed by professionals to identify vulnerabilities in web applications. It operates as a proxy, intercepting and modifying traffic between a browser and a web server. This capability allows testers to inspect, manipulate, and assess requests and responses for security flaws such as SQL injection, cross-site scripting (XSS), and other well-known exploits. Burp Suite comprises several modules, including the Intruder for automating attacks and the Repeater for testing specific requests multiple times. Its versatility and comprehensive range of features make it an indispensable tool for penetration testing and ensuring the robustness of web application security.
Set the Scope
Setting the scope is crucial for any penetration test as it ensures that all scans and tests remain within the boundaries of the defined target. This helps avoid testing areas that are out of scope and prevents legal or ethical issues. Moreover, keeping a well-defined scope helps maintain focus on specific vulnerabilities within the allowed area, streamlining the testing process.
1. Open the Target tab and navigate to Scope:
Target > Scope2. Click on Advanced Scope Control:
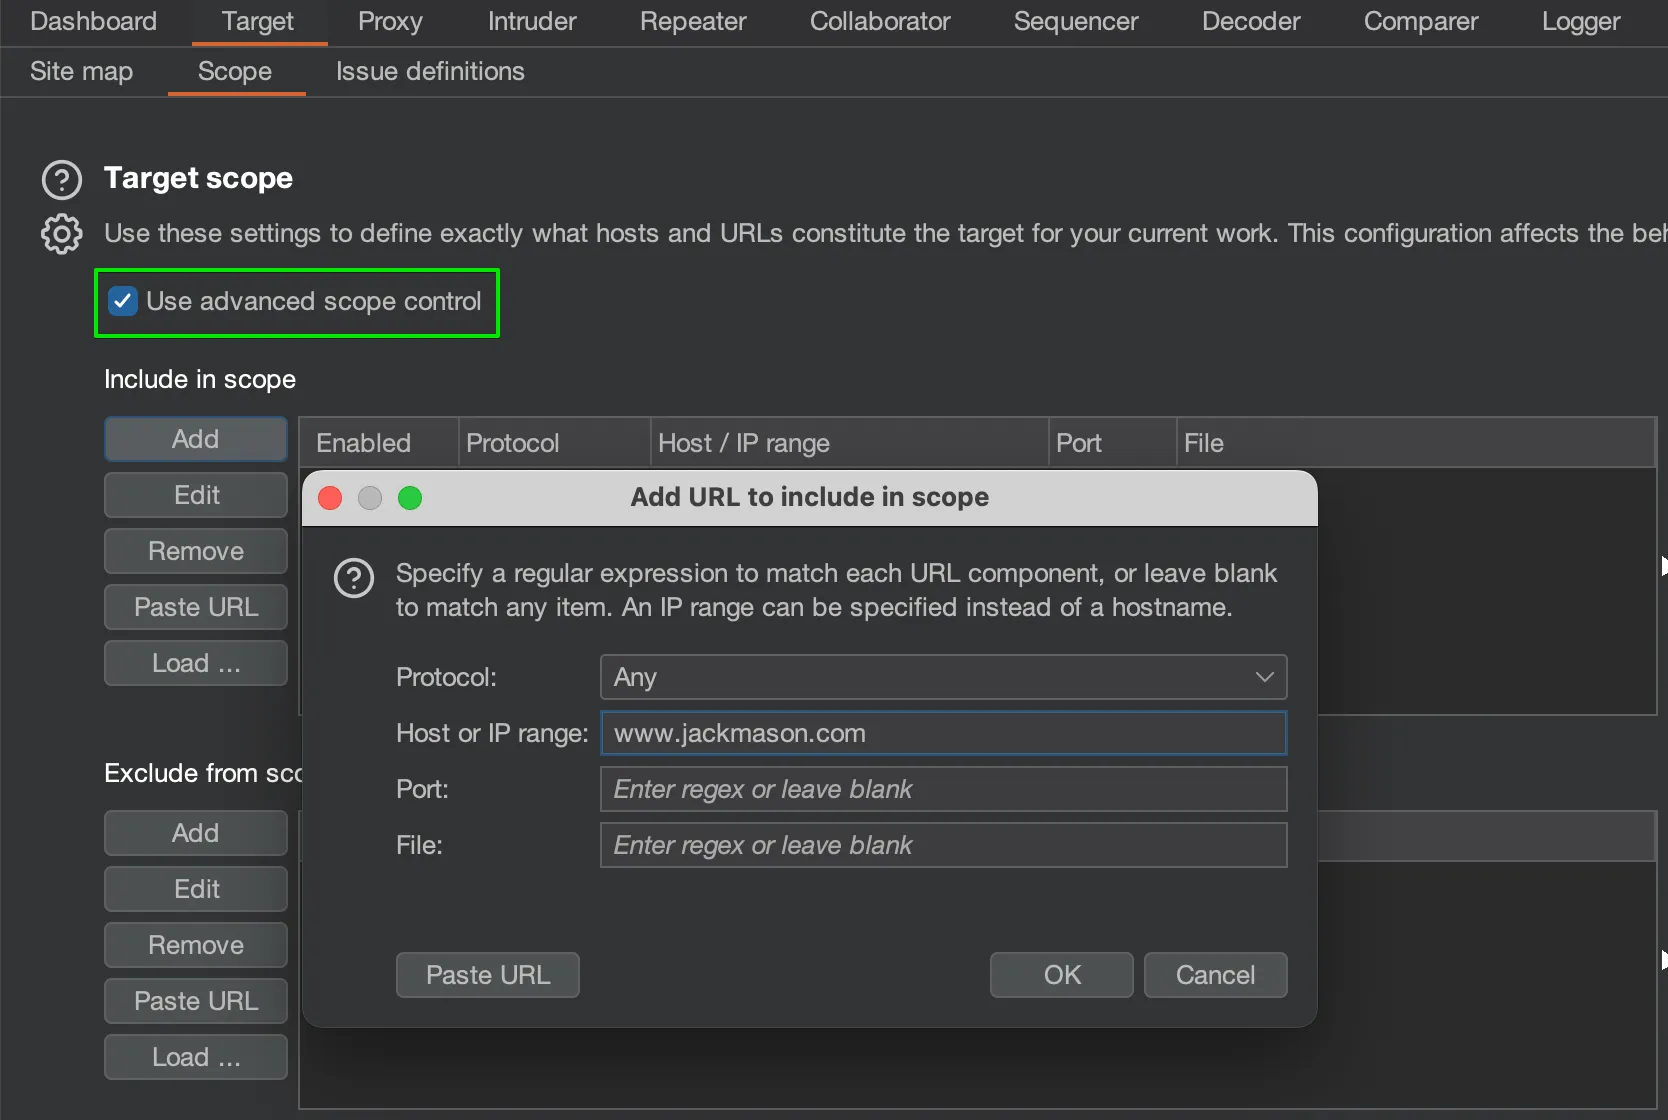
3. Define the scope in the Sitemap:
Target > Sitemap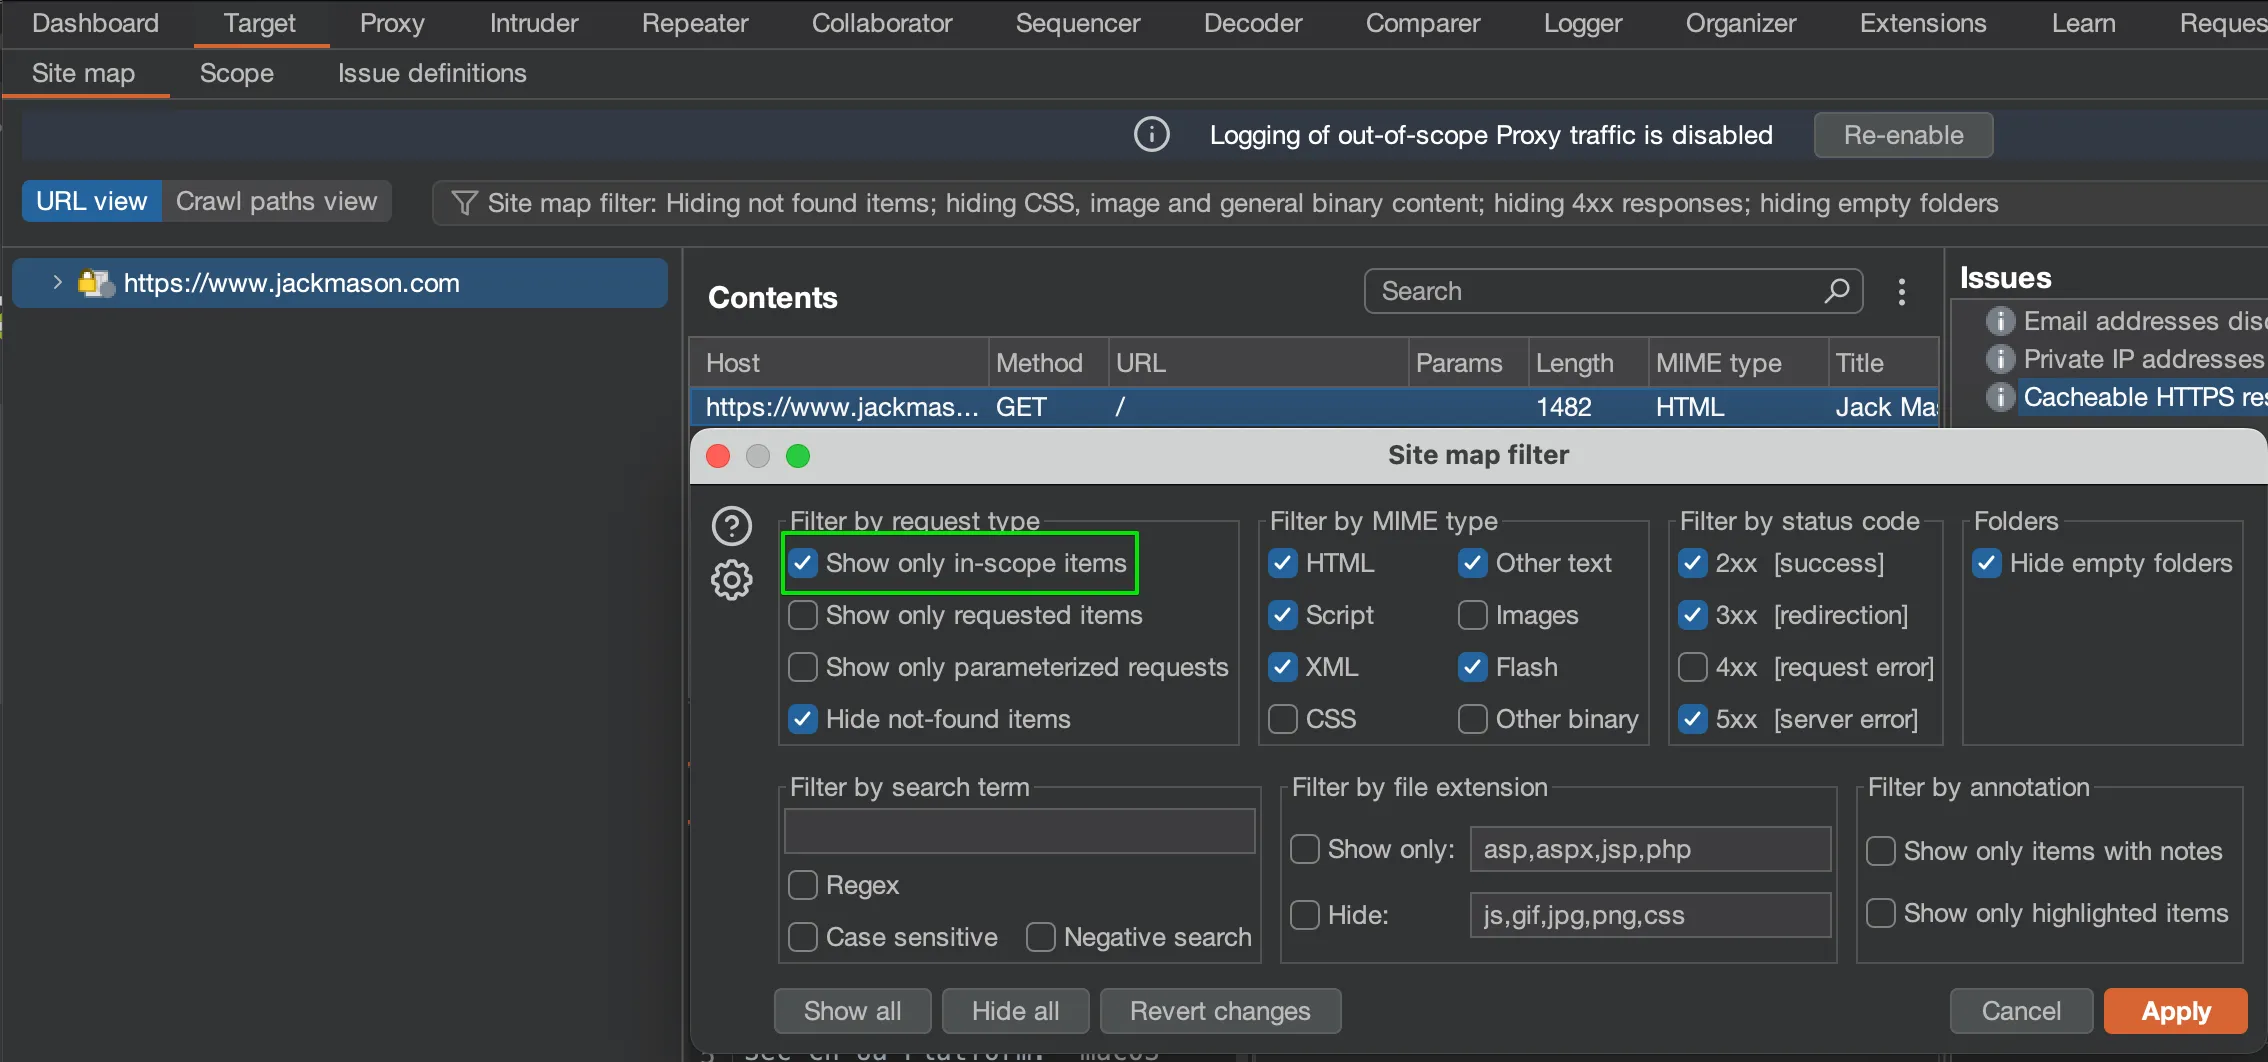
Configure Proxy Settings
To ensure effective web application testing with Burp Suite, you must configure the proxy settings correctly. This helps intercept and analyse traffic between the client (your browser) and the server while remaining within your defined scope. Properly set proxy rules streamline the process, keeping irrelevant traffic out of your testing efforts.
1. Open Proxy and navigate to Proxy Settings:
Proxy > Proxy Settings2. Set Request Interception rules:
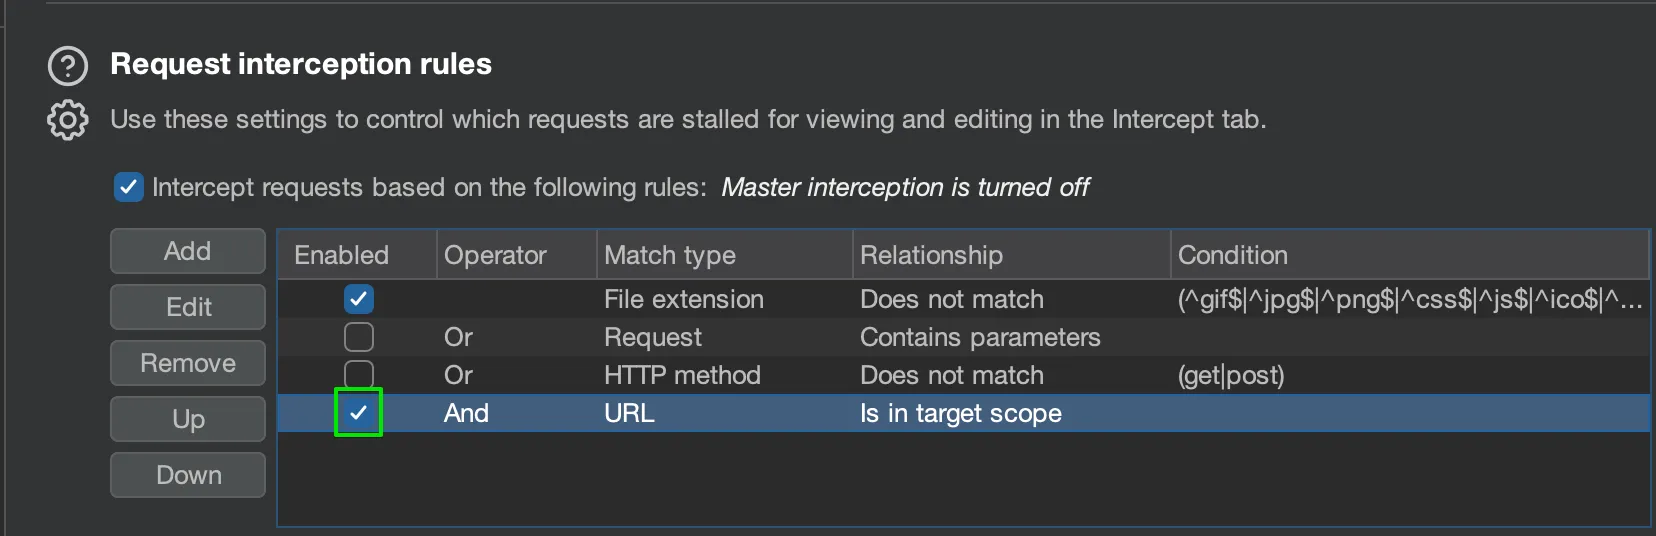
3. Set Response Interception rules:
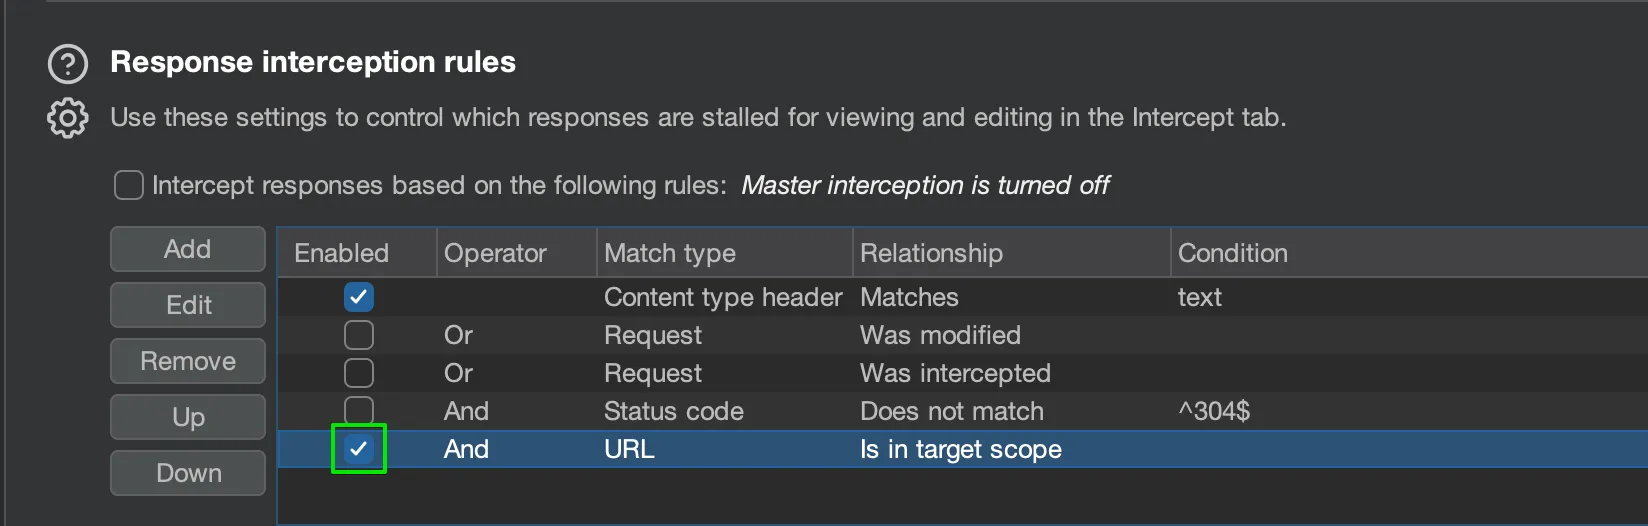
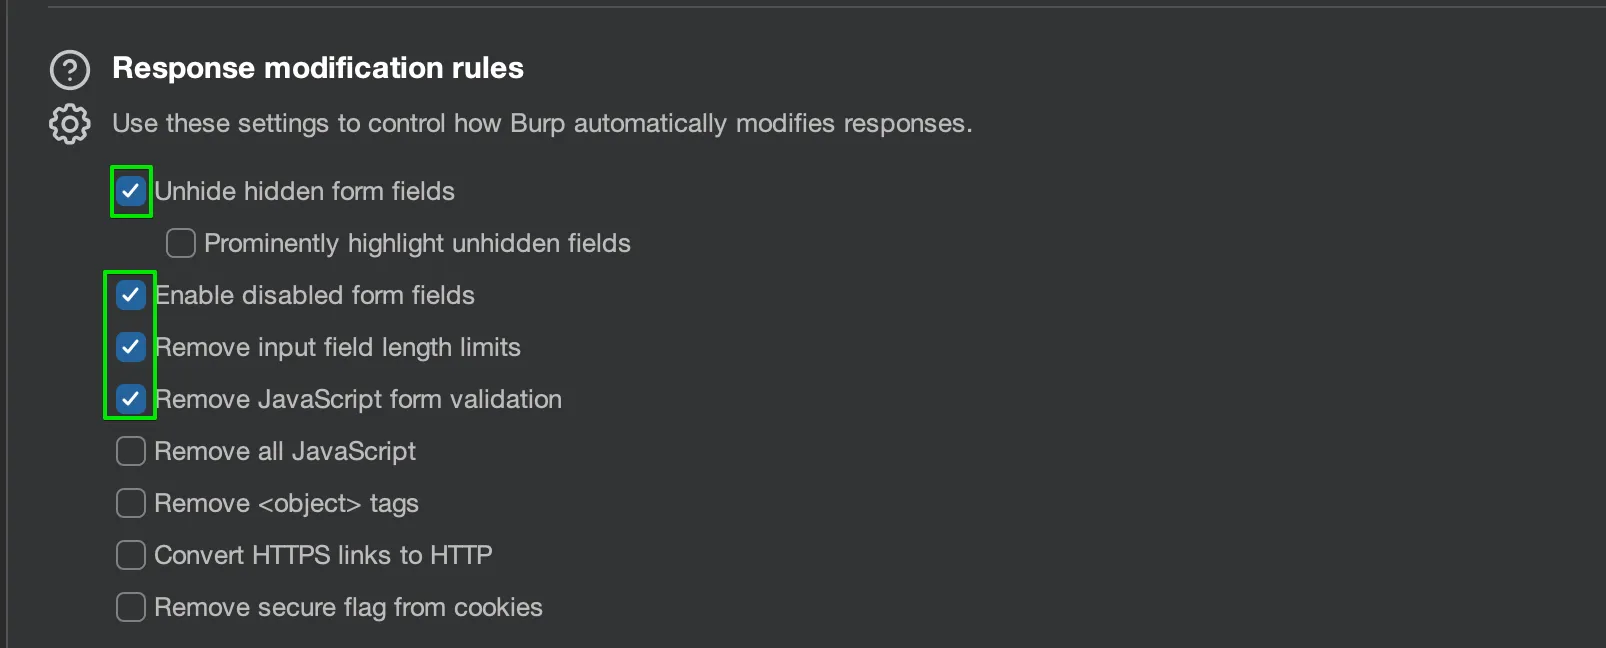
4. Configure Response Modification rules:
Configure Logging
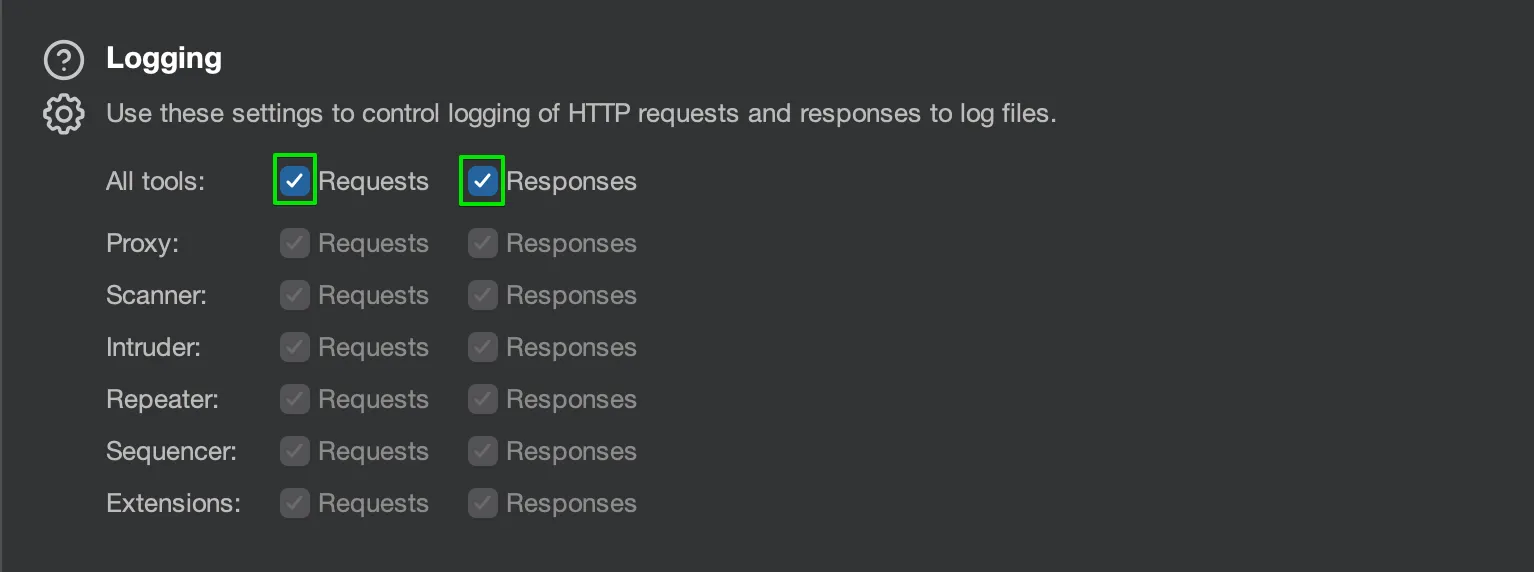
Logging is a critical component of the testing process. Proper logging allows you to capture every interaction between your browser and the application being tested, creating an audit trail for reviewing the security assessments. By enabling logging, you can track your actions, results, and any potential errors or exploits discovered during the testing process.
1. Go to Proxy Settings:
Proxy > Proxy Settings > Project > Logging2. Turn on logging:
Set up Scans
Automated scanning in Burp Suite helps discover low-hanging fruit, such as basic misconfigurations or common vulnerabilities. Although manual testing is essential, scans can quickly identify well-known security issues, allowing testers to focus on more complex vulnerabilities that require detailed analysis.
Crawl Scan
The crawl scan helps identify all discoverable resources within the application by crawling through its various links and assets. It helps map the application and provides insight into areas where vulnerabilities might exist.
1. Navigate to Dashboard and initiate a new scan:
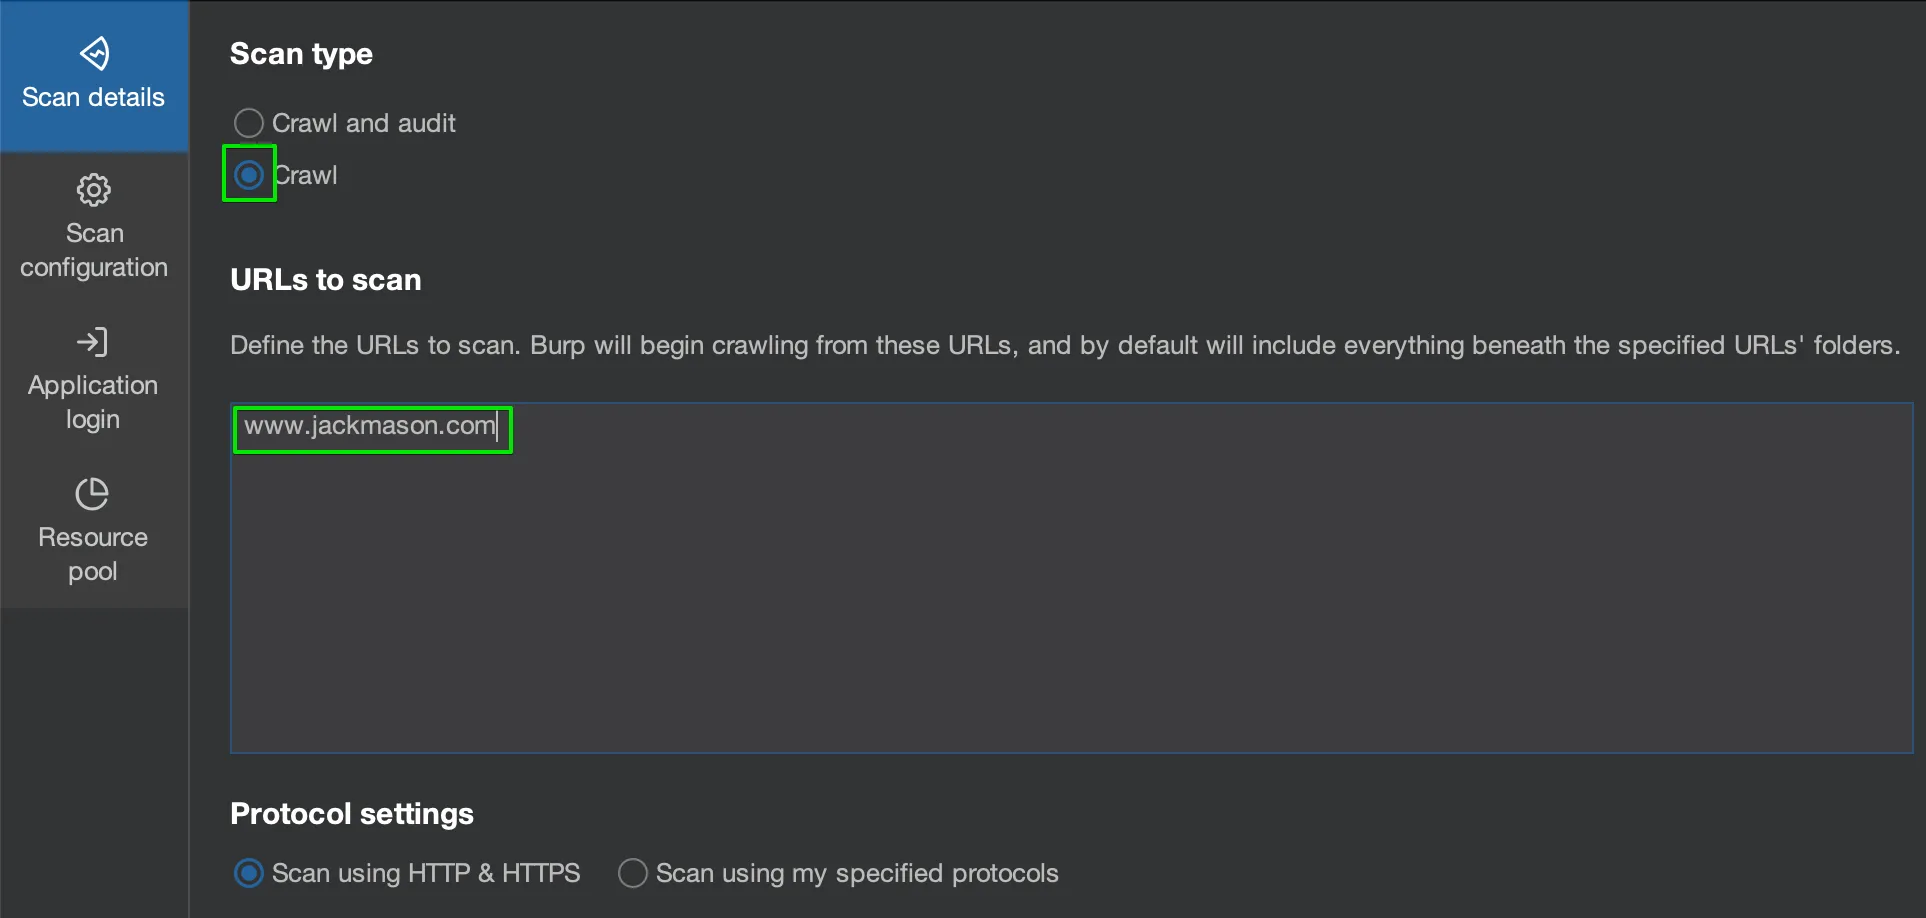
Dashboard > New scan > Web app scan2. Select the Crawl option and enter the target URL for the scan:
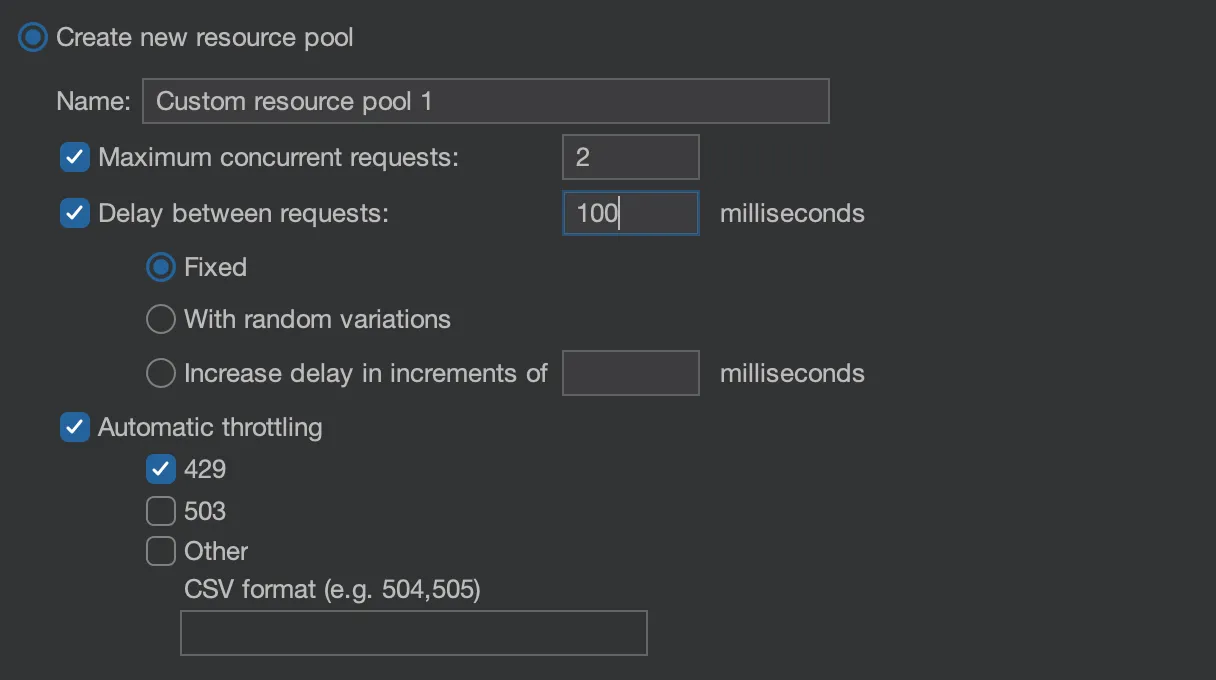
3. Create a new Resource Pool:
4. Run the crawl scan:
Active Scan
An active scan identifies security vulnerabilities by actively interacting with the web application’s elements. This scan applies attack vectors to discover potential exploits such as SQL injection, XSS, and other web-based vulnerabilities.
1. Create a new active scan from the Dashboard:
Dashboard > New scan > New Live task2. Choose a Predefined Task that fits the scope of your test, such as an active security scan:
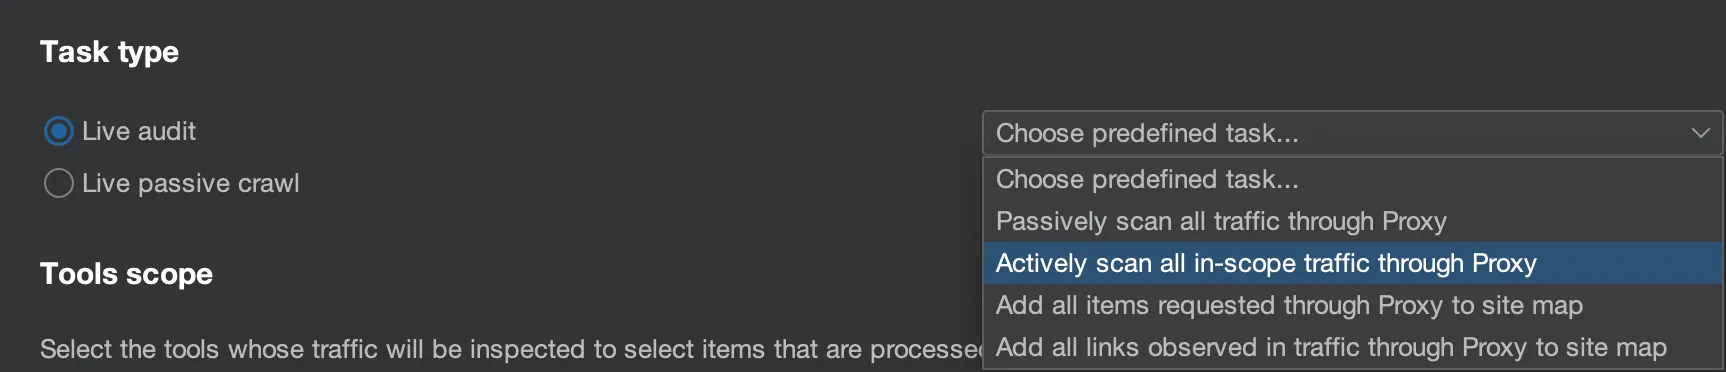
3. Define the Tool Scope to specify which areas of the web application should be targeted:
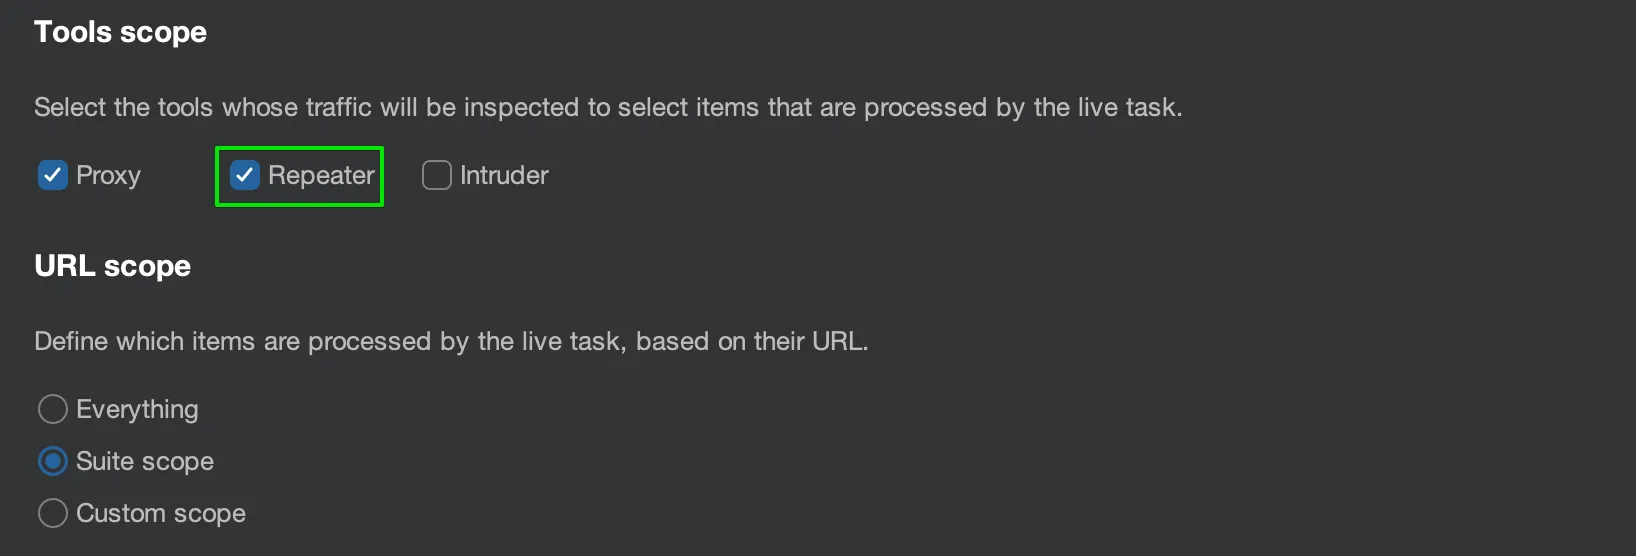
4. Set a Resource Pool to optimise system resources for this scan:
5. Run the scan: