Generating Hacking Labs with AI
Posted on August 19, 2025 by Jack Mason
As I was preparing for another web application examination, I found myself needing to build numerous labs very quickly. Building labs allows you to test your knowledge and solidify your understanding by putting what you have learnt into practice.
This blog post explains how I have been able to generate high-quality labs in under five minutes and how you can achieve the same, all completely free of charge.
Start
To begin, I needed to build a default lab that encompassed all the functionality required for an effective hacking lab. This includes a search bar, login and registration functionality, administrative features, and more. Having completed all the Burp Suite labs, I now have a solid understanding of what constitutes a good lab. I also aimed to build it using a common language such as PHP, despite its diminishing prevalence.
I wanted these labs to be fully containerised, allowing me to spin up the lab on demand and utilise different database and web servers to create a wide range of scenarios for my revision. They also needed to be quick to create, as I often fall into the trap of spending the majority of my time developing revision resources and too little time actually revising from them.
The AI
The release of Google Gemini’s free API has allowed me to integrate AI into all my tools, from those that help me write better reports to those that let me generate and host custom local payloads for client-side attacks. This API feels almost too good to be true.
When Google released the Gemini CLI, I immediately began experimenting with it for my development projects. While I have a good understanding of coding from my computer science degree, I am far from a proficient programmer. I used this tool to quickly develop the Supercar Store, a website with all the necessary functionality for hacking labs, fully containerised. The whole build took me about one evening after work.
The Supercar Store
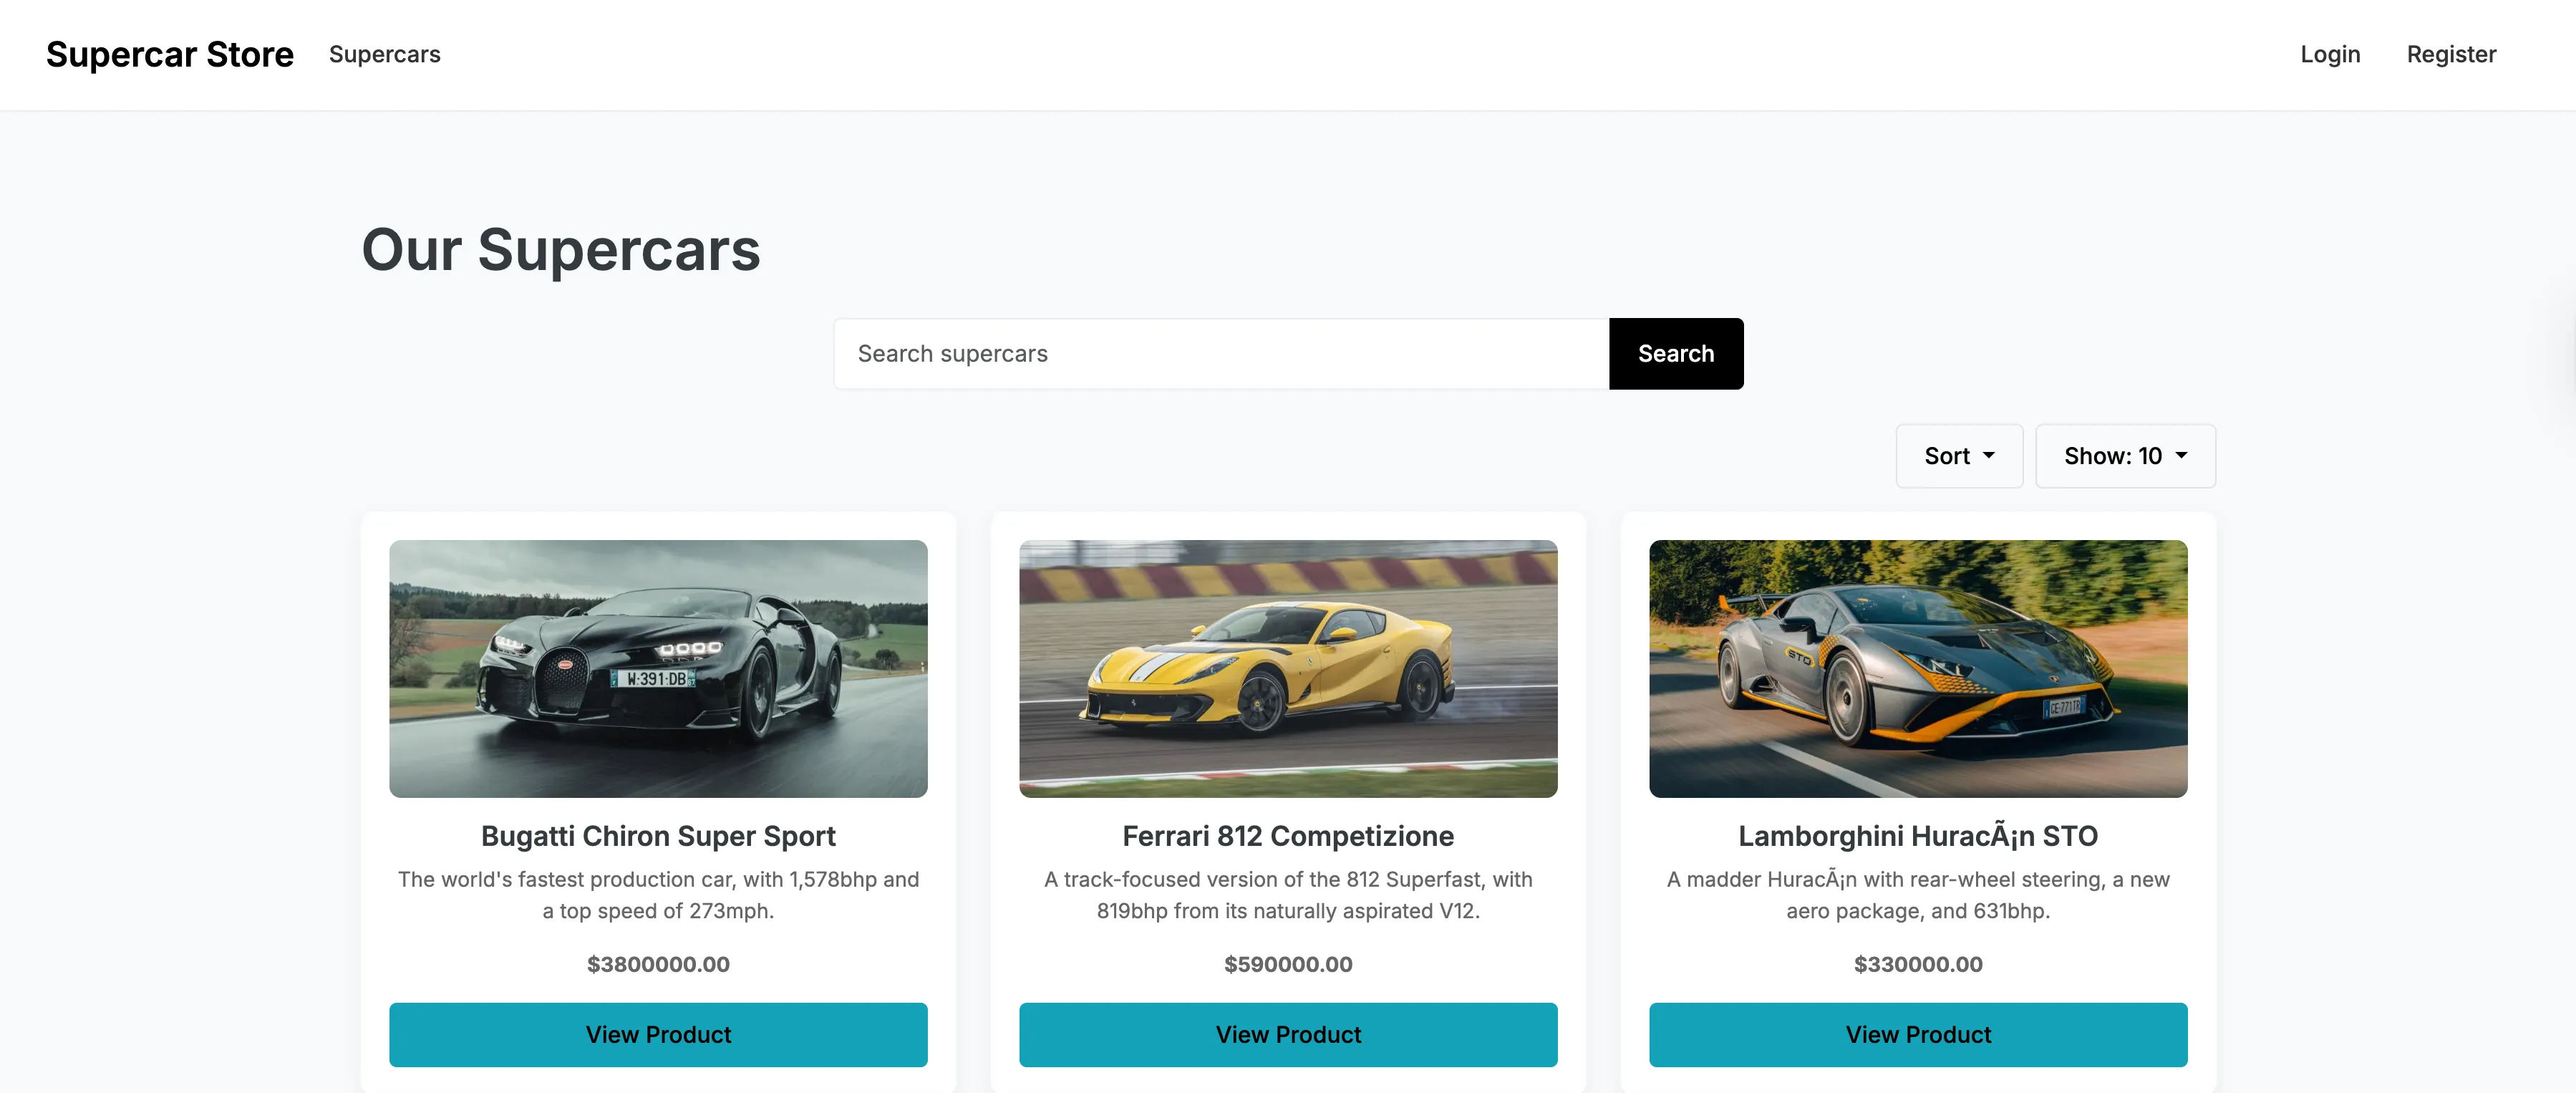
The locally hosted website comes with all the functionality needed for a hacking lab, including administrative, store, and account creation features. This serves as the foundation for all the other labs I intend to build.
This website is available on my GitHub to download here. Run the following commands to have a look around:
docker compose up --buildThe credentials for the admin portal are:
jackmason
jackmason
This lab is currently in a good state, with no glaring vulnerabilities, although I have not yet thoroughly checked it for every potential issue. It only needs to be robust enough that when a vulnerability is intentionally introduced, it remains the only obvious one.
Once again, this aligns with my goal of not spending all my time building revision resources, but instead having ample time to revise from them.
Creating a Vulnerable Lab
To create a vulnerable lab, follow these steps.
Install Google Gemini CLI
Install the Google Gemini CLI from LINK and sign in with your Google account.
Copy and rename the lab
Duplicate the lab you want to edit and rename it as you like. While it is possible to edit specific files of a Docker template, the AI currently struggles with this approach. It is better to give it the complete code and ask it to weaken specific areas.
Open Google Gemini CLI in the folder
Open the Google Gemini CLI within the folder and clearly describe what you want to implement. If your lab requires an attack path, introduce each vulnerability one at a time. After you introduce one issue, make sure it works as intended before adding another.
Use the following as an example prompt:
This is my hacking lab. Please introduce a Cross Site Scripting vulnerability into the search bar on the products page. Ensure that the necessary security controls are loosened to allow for this issue. Please update the metadata file to match the lab.Wait about one minute and then test that the vulnerability has been implemented successfully. If there is any issue or error, paste it back into Google Gemini and let it resolve the problem.
Building a Lab Management Platform
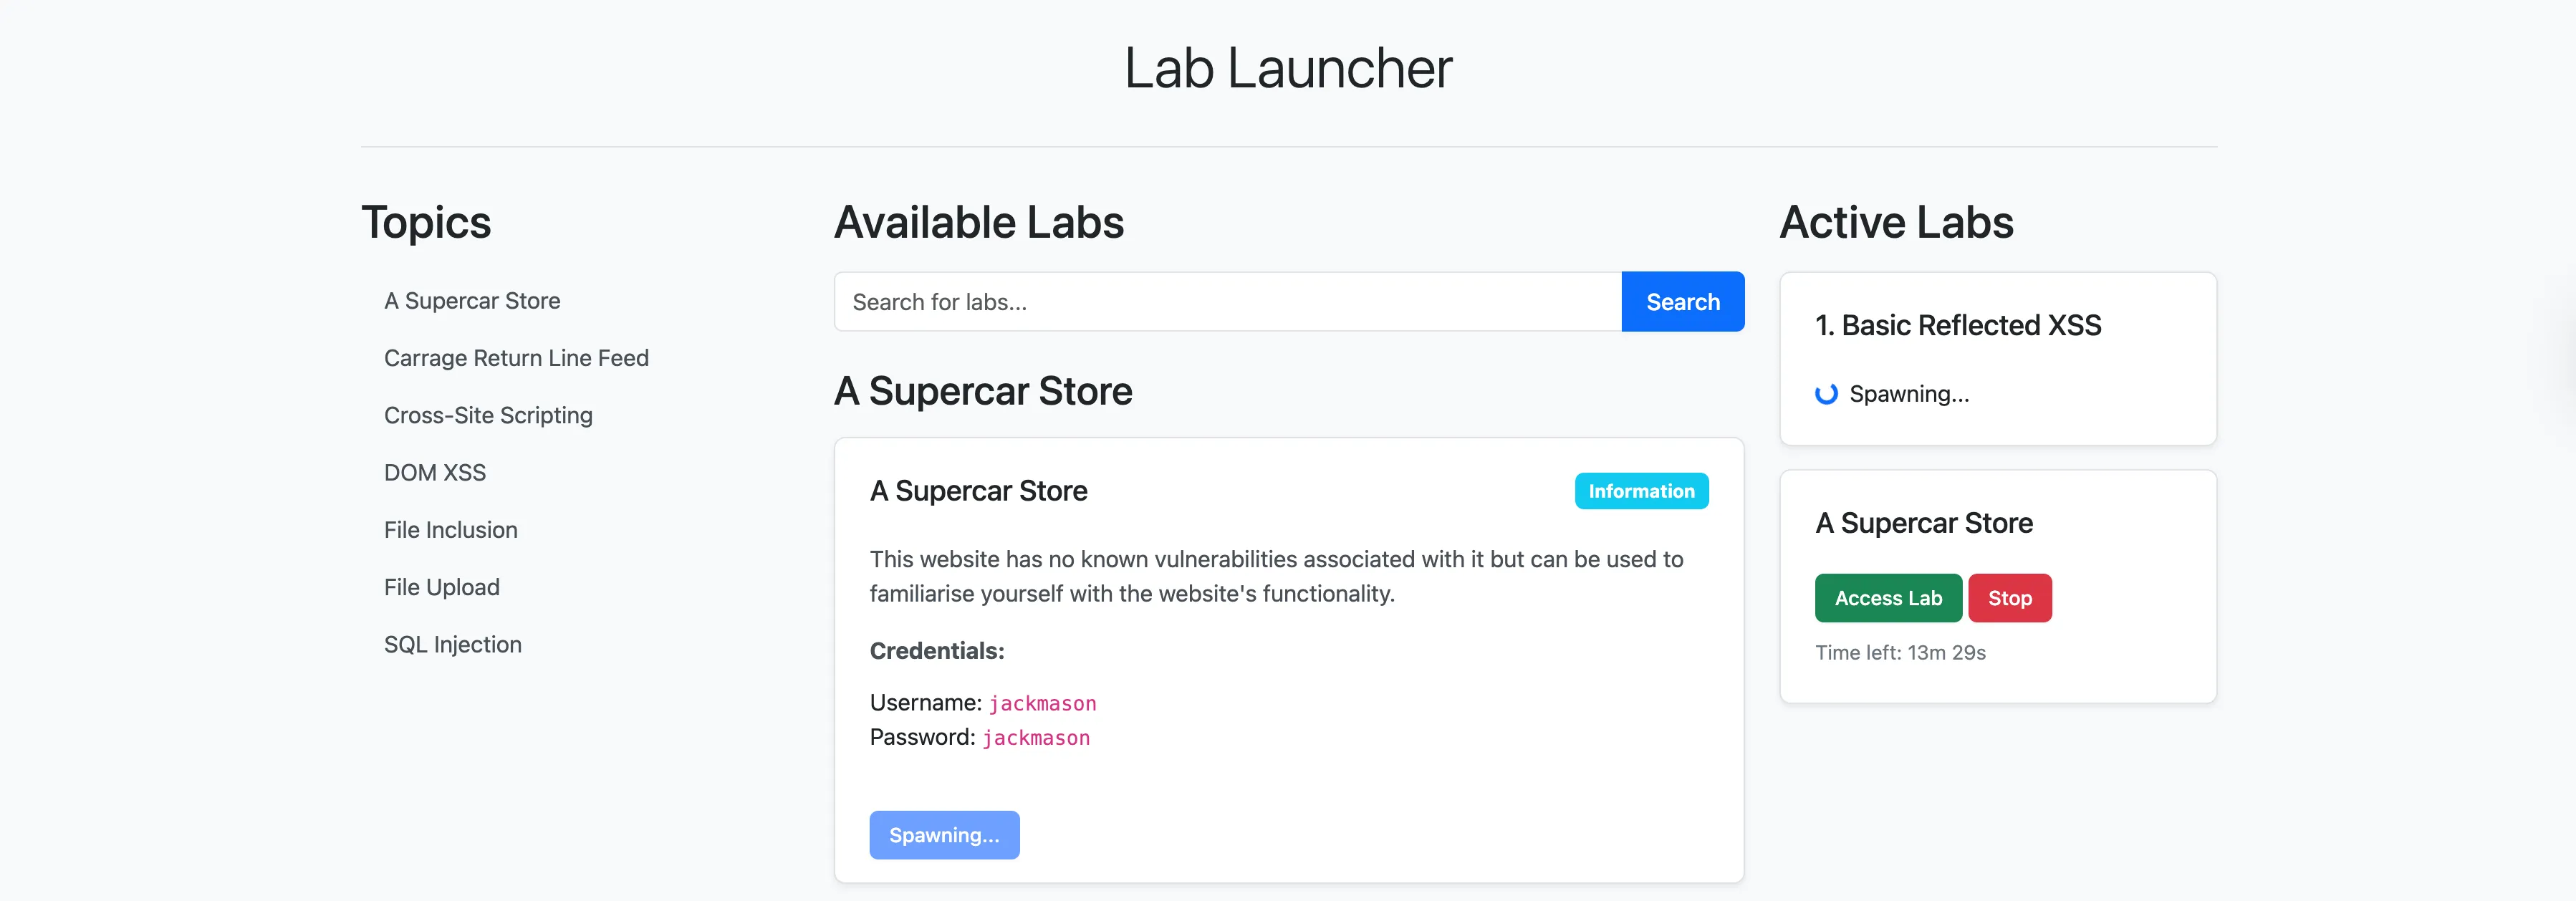
A further step, after creating several labs, is managing them. I built a Python Flask web application that scans folders for labs, displays their metadata, and allows a user to spawn multiple labs, each lasting fifteen minutes. These labs are spawned on localhost from port 10000, allowing for easy access, discovery, and spawning of my custom-built labs. When you build several labs, it becomes very inconvenient to run the Docker containers each time you want to spawn a lab.